The cleat wiring is not a permanent type of wiring, it is a temporary type of wiring. The different materials required for this wiring are as under:
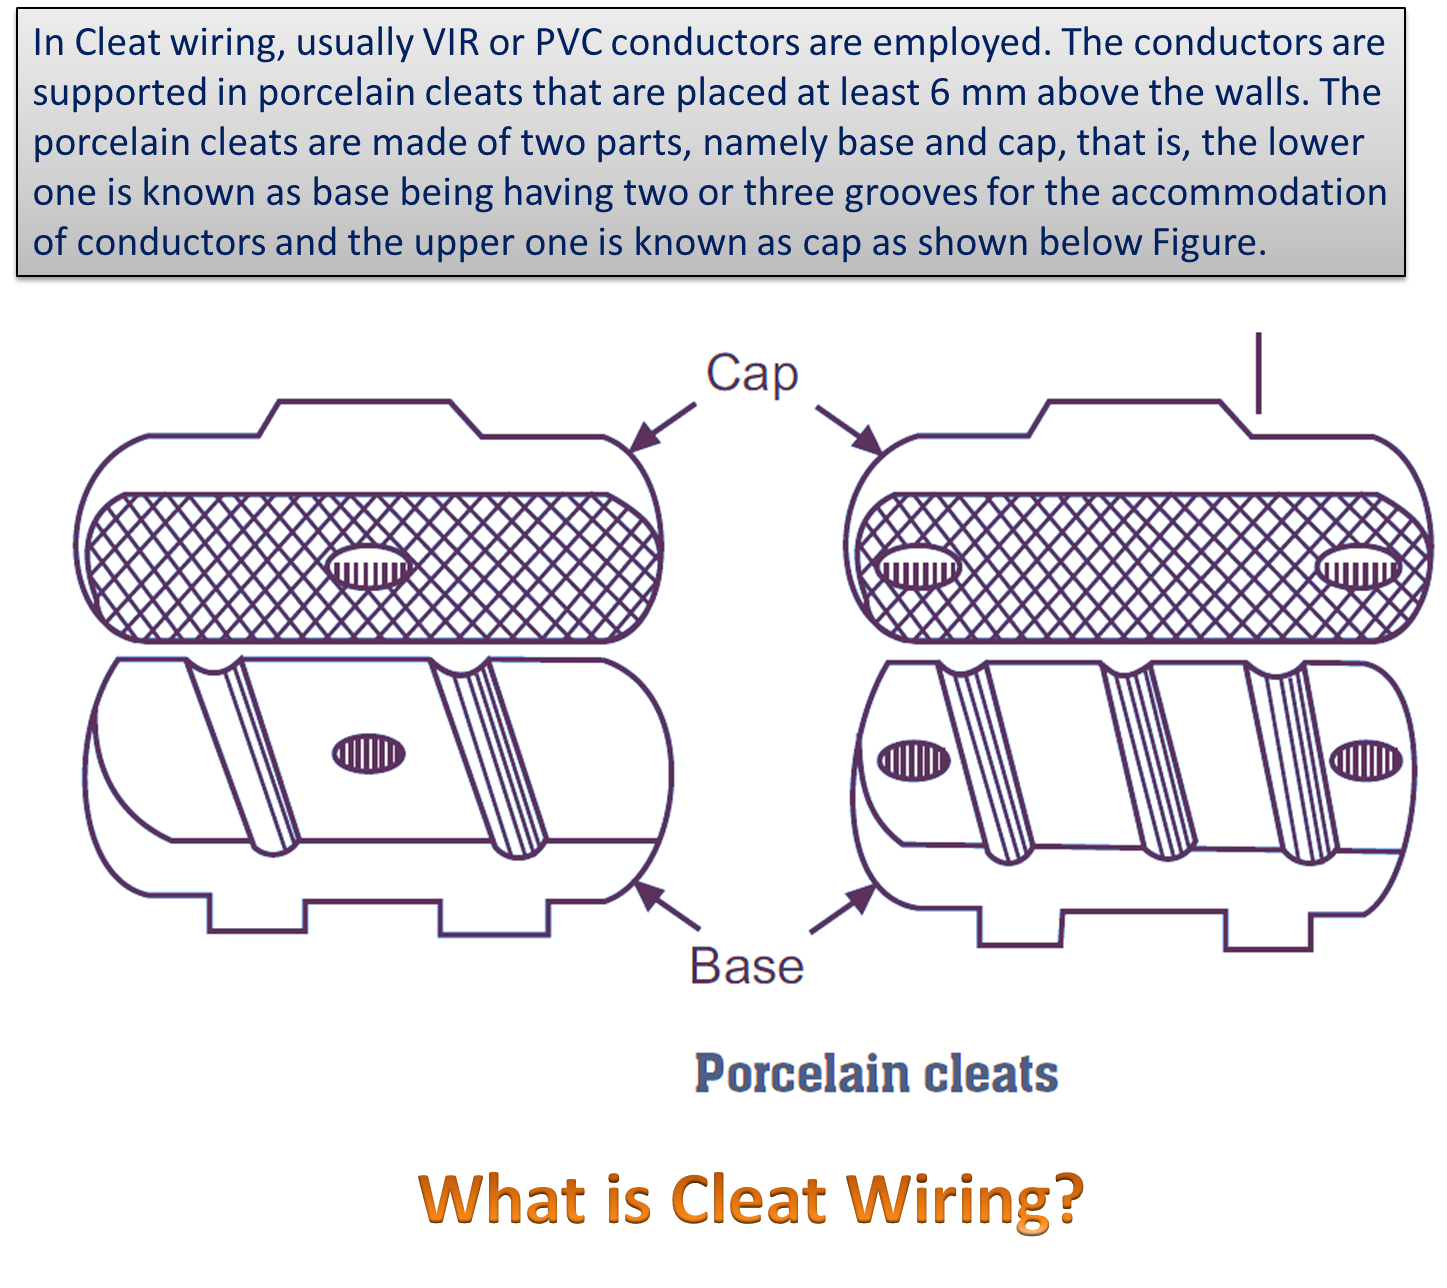
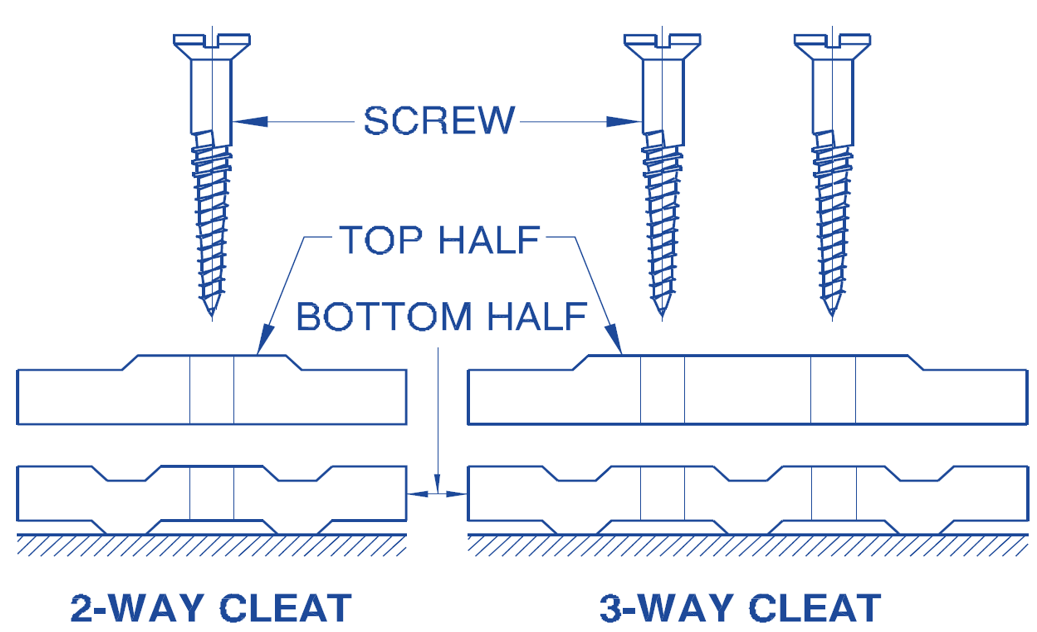
Porcelain cleats: The porcelain cleats are used to hold the wires. These are single way, two ways and three ways etc. There are two parts, the base and cover. The base has grooves for supporting the wires and is fixed on the wall or any other suitable place. The cover is used to press and keep in place and tight the wires. There is a hole in the cover and base both to tight the complete porcelain cleat as shown in Fig. 1.
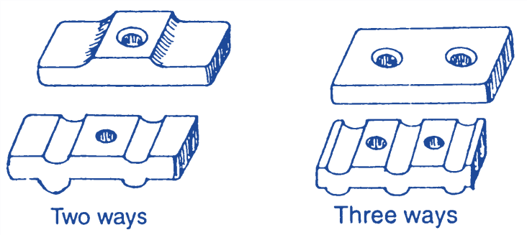
Fig. 1. Porcelain cleats.
Sometimes wooden cleats are also used.
Wires: Generally P.V.C. or V.I.R. wires are run in the grooves of the cleats. These wires are held intact by the wooden or porcelain cleats. Gitties. These are used to fix the cleats on the wall or ceiling and the screws are used to fix cleats. The gitties are made of wood.
Screws: Different sizes of screws are used to fix the cleats, blocks, accessories and board etc.
Round blocks and board: Wooden or P.V.C. round or hexagonal or rectangular blocks are used to tight and fix the accessories.
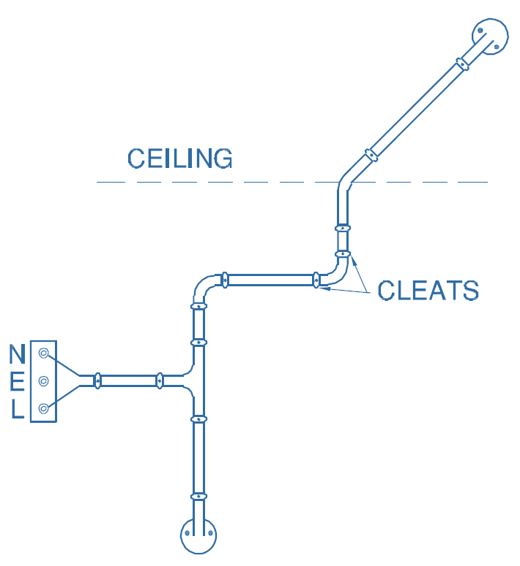
Accessories: Different accessories like switches, holders, wall sockets are used depending upon the requirement. The complete diagram is shown in Fig. 2.
(a)
(b)
Fig. 2. Cleat wiring.
There are the following points to be kept in mind during installation.
- This wiring should be done above two metres from the floor. If it is required to install then use conduit pipe.
- The maximum distance between the cleats should not be more than 60 cm and the safe distance is 30 cm.
- The wires should be in stretched condition. The wires should not come in contact with the wall or with each Other,
- The bend should not be sharp and conduit pipe must be used with a wooden bushing at both the ends which it is required to cross a wall. The cleats must be used near the bend, turning and accessories.
- Wires should not cross each other. Use bridge in case if it has to cross.
- The wires should not be run near the water or gas pipes.
- This wiring should not be used for high voltage.
There are the following advantages and disadvantages.
Advantages of Cleat Wiring
- It requires less labour and workmanship.
- It requires less time and less cost.
- It can be easily removed when not required.
- Extension and fault location is easy.
Disadvantages of Cleat Wiring
- Less life.
- Less efficiency.
- Dust and dirt spoil the appearance.
- The whitewash, oil, dust and smoke injure the wires.
- No safety from fire, dampness, mechanical damages, and rats etc.
Uses: This type Of wiring is only used for temporary purposes. It must not be done in the damp places, blacksmith shop, moulding shop etc. It is only used in the camps for temporary purpose. In no case it should be used for more than six months. If it is required to use for more than three months it should be got inspected and tested again.